Create or update categories with import tool
Best practices for creating or updating categories using the import tool
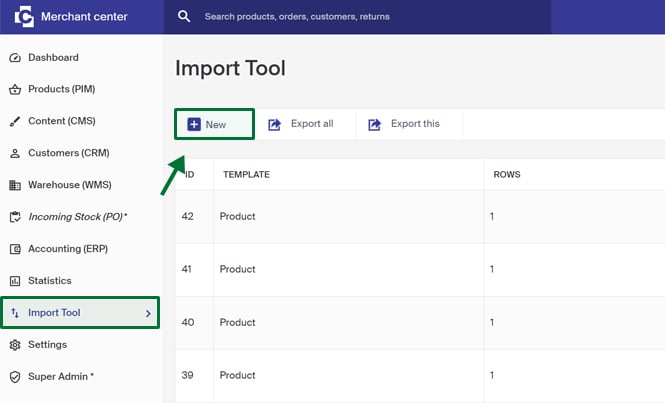
In Merchant Center go into: Import Tool > New

If you have a file ready, click on Select file directly and choose what file you want to import. Set which type of file is uploaded by going into file type in the drop down File Extension, choose template type category and then click on Next. (Go directly to the next step in this guide here)
Using the import template for categories
If you want to work with import template for categories then you start with downloading the template file. It can be downloaded by going through the drop down in Template Type then choose Category and thereafter click on download template file .

- Next, populate the file with the necessary data that needs to be imported. You have the option to either create new categories through the import or update existing ones. If the ID field is left empty, a new category will be automatically created. For a detailed description of the different fields, simply click on "View template description".
If you're working on a mac, it's good to think about saving the file with correct encoding (UTF-8) when saving in excel.
- When you are done with your file you continue by uploading the file. Click then on select file and choose the file you want to import. Set which type of file you want to be uploaded by choosing the file type in the drop down File Extension, choose category in the template type list and click on Next
Match field in the import tool
Fields with a padlock (requires match) icon is mandatory and needs to be matched for the import to be implemented.
It's a good idea to only match the fields you want to update if you are going to update a category. If you are matching an empty field for example Name, then the it will replace the existing name and become empty
If you are using said import template then the existing fields will be matched automatically. Below is a picture of an import with the import template where existing fields have been matched.

If you want certain fields to not be included in the import, then you need to remove them. The picture belows shown an import with the import template where it's chosen to include the fields for metaTitle, MetaDescription and MetaKeywords
You remove fields by using drag&drop and dragging the fields that are under your file and drop them into the box under Not matched from your file.

If you are working with a file that is not based on the existing import templates, then the columns can be named differently and need to be matched by yourself (see pictured example below)
You do this by using drag&drop and dragging the different names that are in Not matched from your file, to the place beside the field you want to it to match with.

After you have matched the field you want in the import (existing required field must be matched) then you can click on Start import to start the import.

The import is done when it says 100%. In the column to the right is a summary of the import.
